|

A freshly prepared cutting.

When you plant your cutting, verify that the
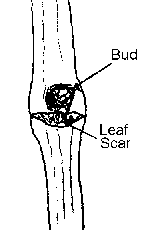
orientation is correct. The bud should be above the leaf
scar.
|
Cuttings from dormant vines collected in December or
January grow easily into new plants.
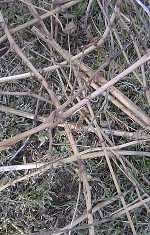
The easiest source for the cutting is the discarded
material coming from pruning a vine. I use only the wood of
the year. Choose the biggest stems, and cut them in segment
of 4 or 5 nodes. (The one shown in the first picture
has 4 nodes).
The buds are visible at the nodes. You should
verify that the top bud looks allright, and has not been squashed or
otherwise damaged. The top bud is the bud that will produce
the new wood. The cutting will be planted so that it is out of
the soil mixture.
The lower 3 buds are to be buried, and they are the
main source for the root system.
It is extremely important to identify which end of the
cutting is supposed to be up, and which side is supposed to be
down. The best way to check is to look at one of the
bud. Just below the bud is a crescent shaped scar which is
where the leaf was connected when the cutting was growing (see
diagram). Plant the cutting so that the scar is below the
bud. Cuttings planted upside down are unlikely to grow.
When the cuttings are ready, they are planted,
preferably, in a frost free area. They can be planted in sand
or dirt.
Once they are planted, the soil mixture in which they
are should not be allowed to dry up completely, but shouldn't be
kept too soggy.
Here in Phoenix, I find it more convenient to just
plant them in a protected area of the garden, so that I don't
have to move them until the following fall. By then they have
developed a sturdy root system, and they are ready to be planted at
their final destination.
Grape cuttings are easy and you should expect a good
percentage of success. Have fun! |

The result of a grapevine pruning
operation: the perfect source for the cuttings.

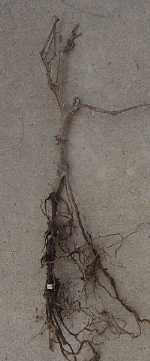
The cutting after a year. You can see
that the roots have been produced mostly immediately around the
nodes.
|
![]()
![]()